 Loading... Please wait...
Single Beam HID Installation Guide
Posted by HIDS Direct Ltd on 30th Jan 2014
Single Beam Installation Instructions:
1. Verify that the HID Conversion Kit includes all components required for the installation (A list of component available below)
2. Disconnect the car battery.
3. Remove dust cover and factory halogen light bulbs.
4. If your vehicle is equipped with headlight dust caps, drill a 1"(24mm) hole to accommodate the wiring harness.

5. Remove the xenon HID bulb from the protective casing. Be careful NOT to touch the bulb. Handle it by its plastic base. If any grease or dirt gets on thebulb wipe clean with rubbing alcohol.

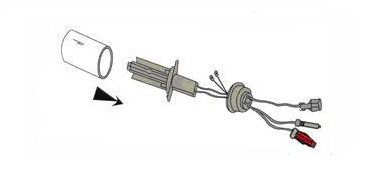
6. Put the bulb's wiring harness through the dust cap (as illustrated).

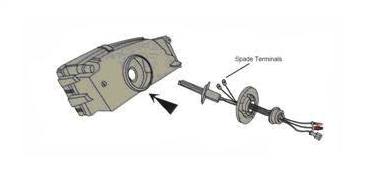
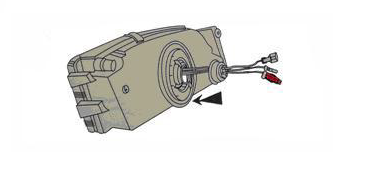
7. Insert the xenon HID bulb into your headlight and secure it.
8. Connect the spade terminals (positive & negative) to the factory headlight wiring harness.
9. Insert the rubber boot (on the wiring harness) through the hole on the dust cap (which you drilled earlier).

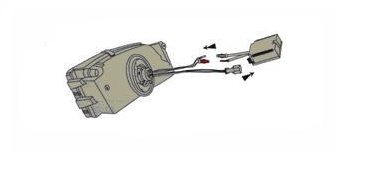
10. Connect the bulb to the ballast. The quick release will "click" once fully secured.

11. Find a mounting location for the ballast. Use the ballast bracket, screws or zip-ties as needed.
Note: Do not drill holes on the ballast box, mount away from moving components and mount to a secure location.
12. Check your vehicle's headlight fuse. Make sure it is rated at 20amps or higher. Replace the fuse with a 20amp fuse if your headlight fuse is of a lower rating.
13. Reconnect the battery cables.
14. Turn light switch on and allow your new xenon light to run for 10 minutes
Recent Posts
All prices are in JPY © 2026 HIDS DIRECT Store. All rights Reserved | Sitemap
hids-direct.co.uk, Car Part Hut Ltd, UK Registered 13039569 VAT Number GB 365025020
Registered office 140 LEE LANE BL6 7AF HORWICH GB


 Euro
Euro


